

Cooking with fire changed what people could eat and how they prepared it. Heat softens some foods, develops flavor, and can destroy harmful microorganisms when the right temperature is reached for long enough. It does not make spoiled food safe again. From the first cooking fires to a modern oven, learning to control heat has been central to cooking.
We have come a long way since then, but the same question still follows us into the kitchen: how do we know when the food is ready? A browned crust and a pink center tell only part of the story. The Maillard reactions between amino compounds and sugars help create the aromas and colors of roasted food; caramelization is a different set of sugar reactions. Both depend on conditions such as temperature, moisture, and time. A thermometer turns one of those variables from a guess into a measurement.
Let’s look at probe, oven, candy/frying, and refrigerator/freezer thermometers. Those names describe their jobs, not necessarily their sensors: digital, dial, and liquid-filled instruments can use different mechanisms and cover different ranges. Choose a thermometer for the conditions in which you will actually use it.
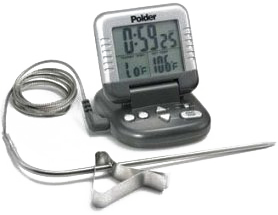
Probe thermometers: These come in two familiar forms: an instant-read probe with a display attached, and a leave-in probe connected by a cable to a separate display. They do not all use the same sensor. Many digital probes use thermistors; others use thermocouples. A thermocouple uses two different metals to produce a small voltage related to the temperature difference between the measuring junction and the reference junction. In the diagram, green is one metal and red is the other.
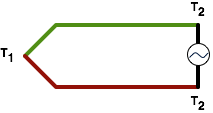
For a simplified example over a limited temperature range, the measured voltage can be written as ΔV ≈ (α − β)(T₁ − T₂), where the two coefficients represent the metals and T₁ and T₂ are the measuring and reference temperatures.
The reference temperature cannot simply be ignored. The instrument must know it or compensate for it before converting the voltage into a temperature reading. This is called cold-junction compensation. In real instruments the relationship also needs calibration because the coefficients vary with temperature.
The useful temperature range, response time, and accuracy depend on the sensor and its calibration. A display showing tenths of a degree is not proof that the measurement is accurate to a tenth. Check the manufacturer’s specifications and calibration instructions. A leave-in probe with an alarm is excellent for monitoring a roast, and a timer is a welcome bonus. Only leave a probe in the oven if it is designed for that use, and follow the temperature limits for both the probe and its cable. Keep cables away from heating elements and direct flames. An instant-read model is normally used to check the food near the end of cooking, not left inside throughout. If you buy only one food thermometer, choose a dependable probe that suits the way you cook.
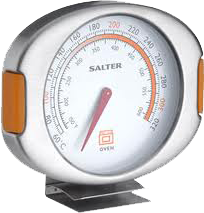
Oven thermometers: These measure the air inside the oven rather than the center of the food. That matters especially in baking, where a cold or unevenly heated oven can ruin a batter. Try the thermometer in different positions to learn where the hot and cool spots are. Ovens cycle on and off around the thermostat setting, and that thermostat senses temperature at one location. A separate oven thermometer helps reveal differences between the setting and the actual temperature. For scale, a difference of 50°F is about 28°C, not 10°C.
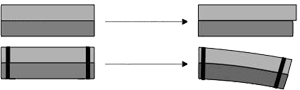
Many dial oven thermometers use a bimetallic strip or coil. Two bonded metals expand by different amounts as they heat, bending the strip or curling the coil and moving the pointer. Their accuracy depends on the design, calibration, and rated range. The useful question is whether the thermometer gives a dependable reading where you need it. Use it to check your oven’s behavior, and follow its calibration instructions rather than assuming every dial is equally accurate.
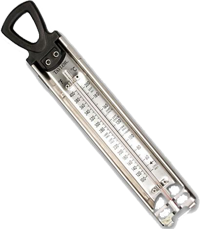
Candy, frying, and freezer thermometers: Traditional liquid-filled models share a simple idea: a liquid expands as it warms and contracts as it cools, moving along a narrow tube connected to a bulb. The liquid and the scale are chosen for the thermometer’s intended range. Candy and frying thermometers must tolerate high temperatures; a freezer thermometer needs a suitable low-temperature range. Digital and dial models are available too, so being liquid-filled does not automatically make a thermometer the most accurate. Use the right tool for the job. A freezer thermometer monitors the temperature; it does not control it. Keep a home freezer at 0°F (about −18°C), rather than treating −4°C as a universal definition of freezing.
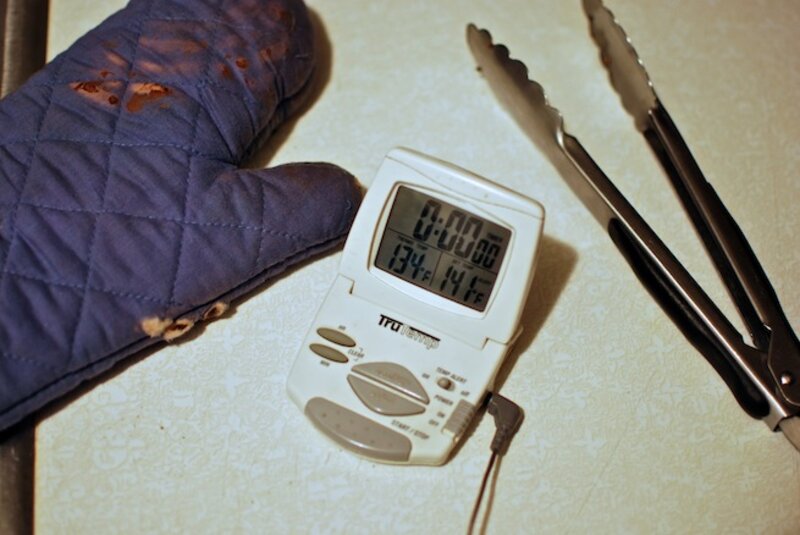
Using thermometers often means working around hot food, steam, and metal. Keep an oven mitt and a pair of tongs handy. Keep it safe, keep it cool.
Celsius and Fahrenheit: These are two ways to express the same temperature. At standard atmospheric pressure, water freezes at 0°C or 32°F and boils near 100°C or 212°F. Convert with °F = (°C × 9/5) + 32, or °C = (°F − 32) × 5/9. Temperature differences use the scale factor without the 32-degree offset. Celsius is common in science and much of the world; Fahrenheit remains familiar in American kitchens. Neither scale makes a thermometer more accurate.
For an everyday poultry safety check, the USDA recommends a minimum internal temperature of 165°F (about 74°C). A reading of 155°F is about 68°C, below that simple endpoint target; lower-temperature cooking requires a validated time-and-temperature process, not a quick guess. The 10°F difference is about 5.6°C. One scale may feel more intuitive to you, but neither is inherently more accurate. What matters is a reliable thermometer, correct placement, and knowing the target for the food. Then it really can be as simple as a beep.