

In Part I, we looked at knife materials, construction, and edges. Now comes the useful question: what should you actually buy? A knife can look impressive in a block and still spend its entire life collecting dust. Let’s build a set around the cooking you do, then give it a cutting board that treats the edge well.
Start with your hand
The handle does not determine how sharp the edge is, but it strongly affects how confidently you use it. Wood, plastic, and composite handles can all work well. The important questions are whether the handle fits, stays secure, and feels comfortable in your usual grip. If possible, try the knife in a shop. The most expensive blade in the room is a poor purchase if you dislike holding it.
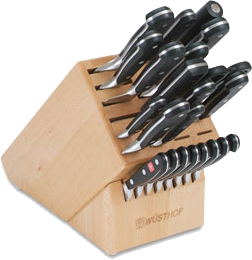
Knife sets are tempting. Shiny blades, a handsome block, and the promise that you now own everything a chef could want. I know the attraction—I bought two sets. Yet I kept reaching for the same chef’s knife, and it was not even the one that came with the set. A set can be good value if you use its contents, but buying individual knives lets you put the money where it matters.
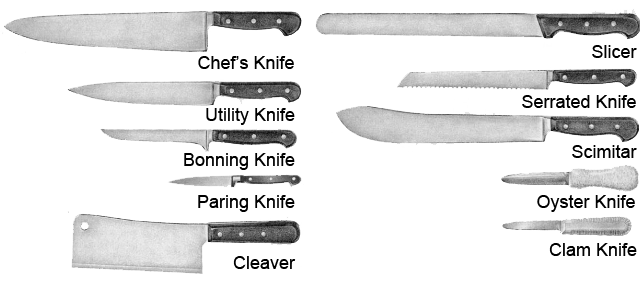
What the different knives do
| Knife | What it does |
|---|---|
| Chef’s knife | The everyday tool for chopping, slicing, dicing, and mincing. Choose a length and weight you can control comfortably; around 8 inches is a familiar starting point. |
| Utility knife | A smaller general-purpose blade for jobs where a chef’s knife feels bulky. Useful for some cooks, but often covered by the chef’s and paring knives. |
| Boning knife | A narrow blade for working around bones. Flexible and stiff versions serve different jobs; flexibility depends on design, not simply a “low-carbon” label. |
| Paring knife | A small, controllable blade for peeling, trimming, and detailed work. Keep the cutting path away from your fingers, especially when working off the board. |
| Cleaver | A heavy meat cleaver may handle suitable bones and joints. A thin vegetable cleaver is a different tool and must not be treated as a bone chopper. |
| Slicer | A long, relatively narrow blade for smooth slices of roasts, cured meats, and other foods where a long stroke is useful. |
| Serrated knife | Useful for bread and resistant skins over soft interiors. A bread knife is an especially practical addition to a home kitchen. |
| Scimitar | A curved specialist blade for cutting and portioning meat. Most home cooks can leave this one to people who need it regularly. |
| Oyster knife | A short, strong shucking tool. Use the correct technique and protect the holding hand; a pointed kitchen knife is not a substitute. |
| Clam knife | A shucking tool suited to clams, with a different blade shape from an oyster knife. Match the tool to the shellfish. |
My starting point is a comfortable chef’s knife and a paring knife. Add a serrated bread knife if you cut bread, then build from there. A slicer is lovely for roasts or delicate terrines, but you do not need to buy it before you have a reason to use it. Buy for your kitchen, not for the empty slots in a block.
Give the edge a good surface
Avoid glass, granite, marble, and metal as everyday cutting surfaces. They are hard on a knife edge, and the sound alone is enough to put me off cooking. A food-safe wooden or plastic board is a far kinder choice.
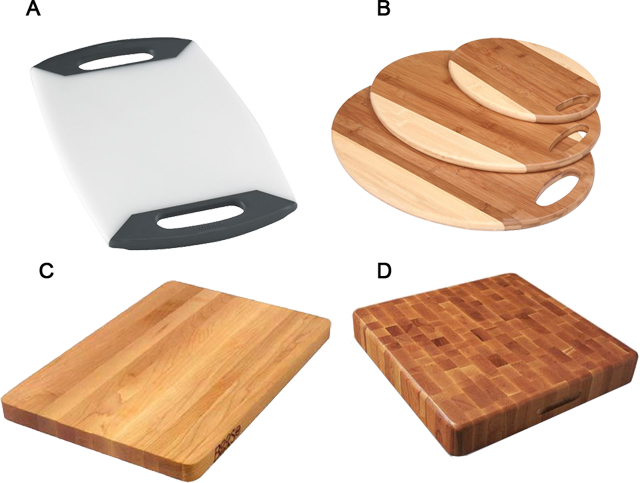
In the illustration, A is a plastic board, B bamboo, C a conventional wooden board, and D an end-grain board. Plastic is practical and often dishwasher-safe when the manufacturer says so. Wood feels good under a knife and can last well with suitable care. Bamboo is durable but can be harder on an edge than some softer wooden boards. End-grain construction changes the orientation of the wood fibers; it does not mean that the board has no grain.
No board is automatically hygienic just because it is wood, plastic, or expensive. Wash with hot soapy water after use, rinse, and dry thoroughly. Follow the maker’s dishwasher instructions; glued wooden boards may split or warp. Replace boards with deep, hard-to-clean grooves or other damage. Food-grade mineral oil can help maintain a suitable wooden board, but oiling is not disinfection.
For sanitizing, USDA describes a solution of 1 tablespoon of unscented liquid chlorine bleach in 1 gallon of water—not a 10% bleach mixture. Use a product suitable for the surface and follow its label for concentration, contact time, rinsing, and drying. Never mix bleach with other cleaners.
Keep raw meat, poultry, and seafood separate from ready-to-eat ingredients. Using one board for raw animal foods and another for produce is a simple way to reduce cross-contamination. Wash and sanitize as needed before changing tasks, regardless of the board’s material.
A useful kit, without the clutter
Buy the knives you need, choose a handle that fits your hand, and use a board that protects the edge. Hand-wash and dry knives promptly, then store them so the edges are protected. A small collection you enjoy using beats a large collection you avoid.
With those basics in place, practice is the next ingredient. A batch of salsa—or ceviche prepared with appropriate food-safety precautions—offers plenty of chances to improve your cutting skills.
Care references: USDA: cutting-board care; USDA: preventing cross-contamination.